Today I’d like to introduce the original creation I made for Art To Play 2019.
Made entirely from scratch and almost ready on time!
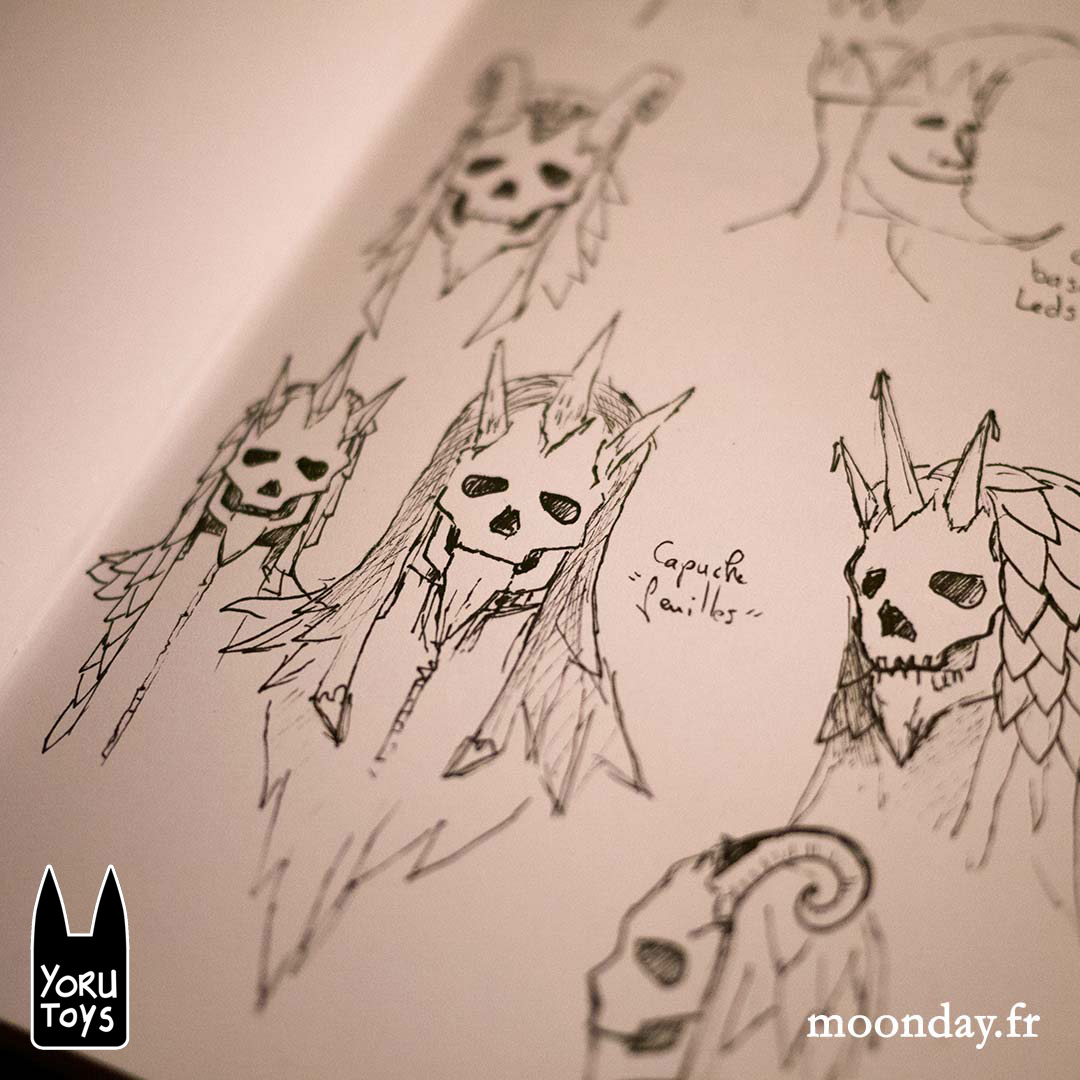
I – Origin
This year I wanted to use a mask for both Halloween and Art to Play therefore I had the idea of a skull based character but I wanted it to be stylised. But most of all I wanted a crown ¬_¬
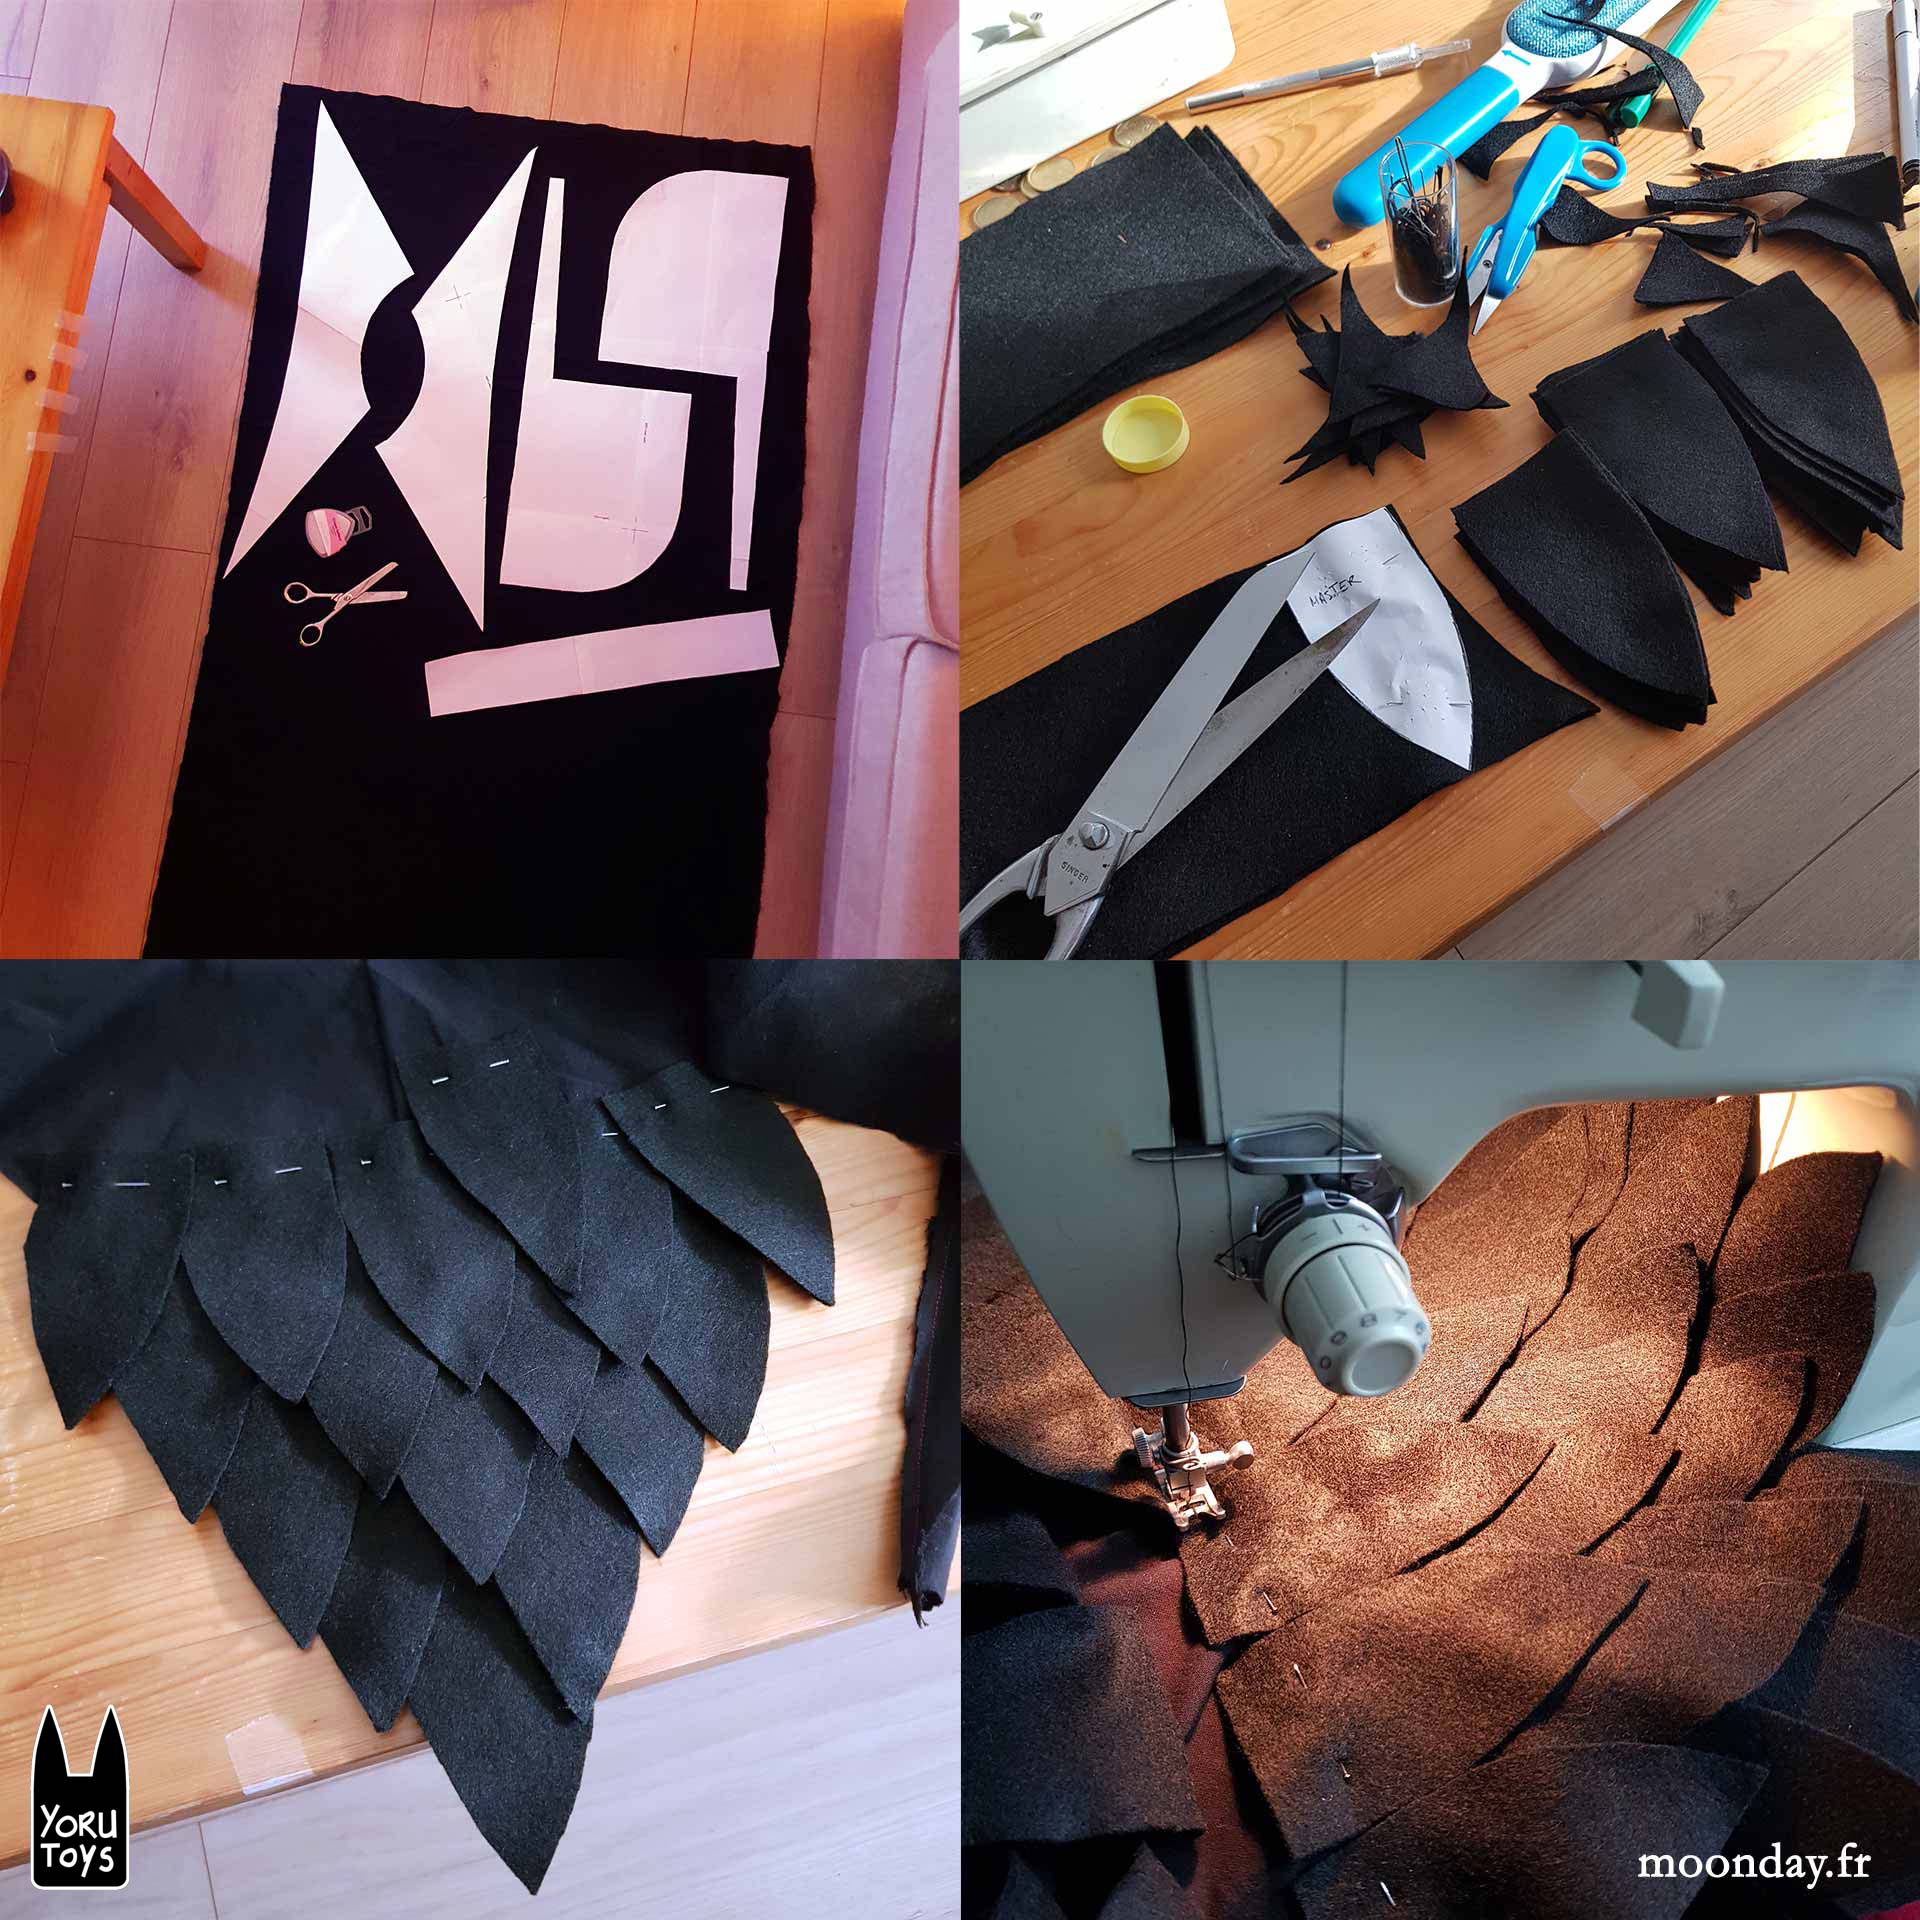
Also inspired by German traditional carnival costume I was interested of having fabric leaves all over the costume. Due to a really tight time schedule I could only create a hood.
II – Scan
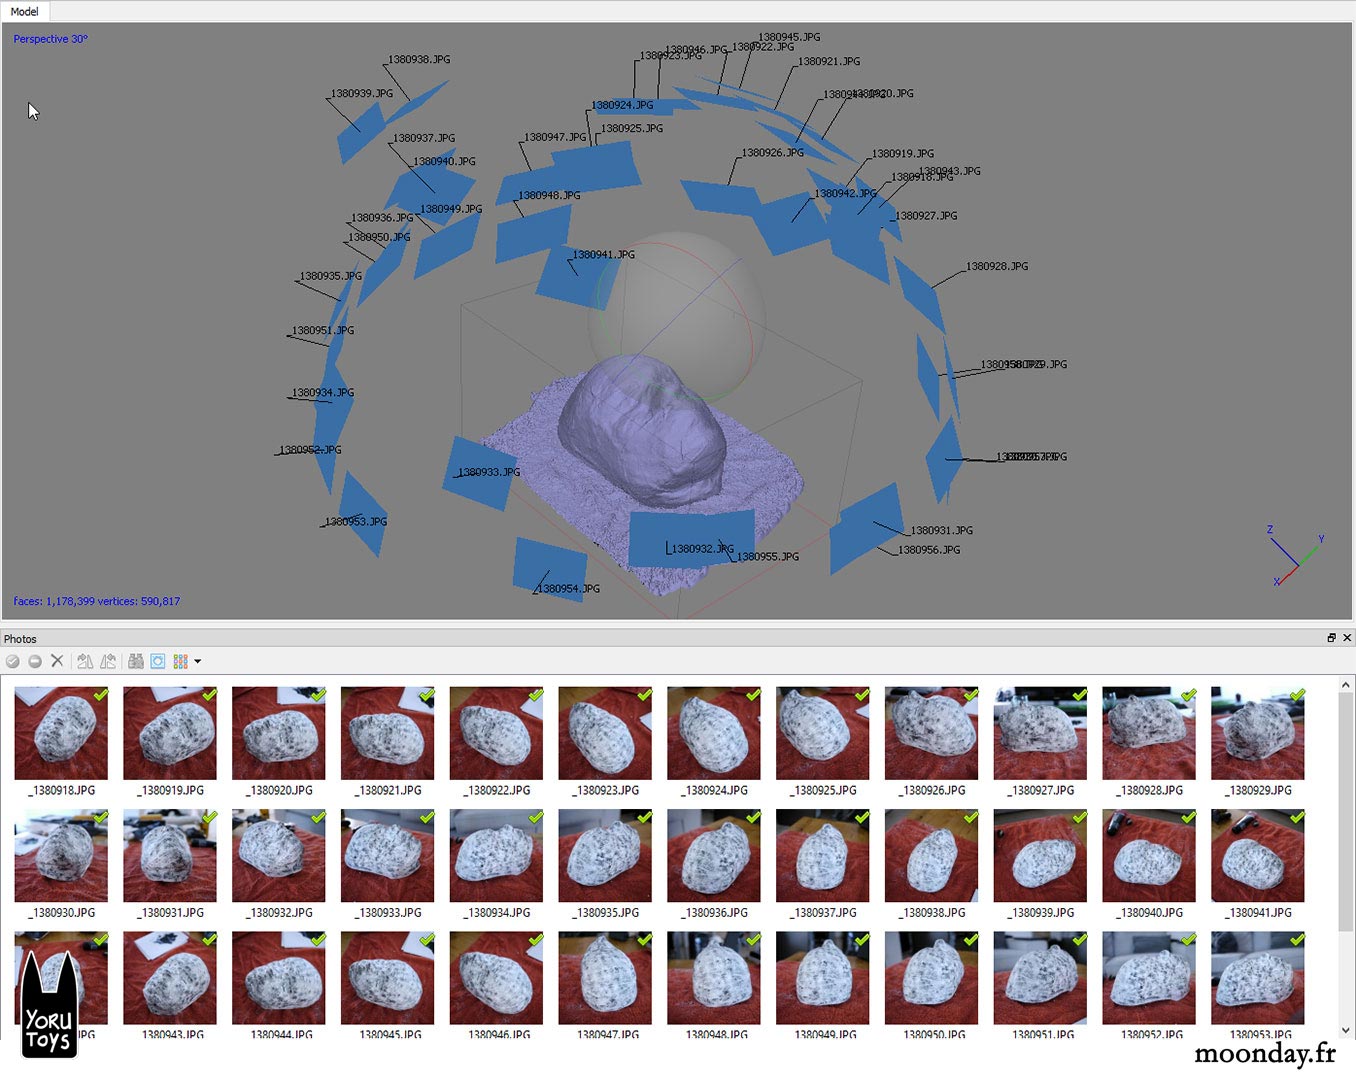
To do so I opted for the 3D way ^^
I first did capture my face the old way using plaster bands, painted the result with a sponge and dark acrylic paint to get a fine pattern resulting in a easier model to scan with Photoscan (now Metashape).
III – Digital sculpt
Once the 3D scanned model was generated I could use it as a base to sculpt the mask over it.
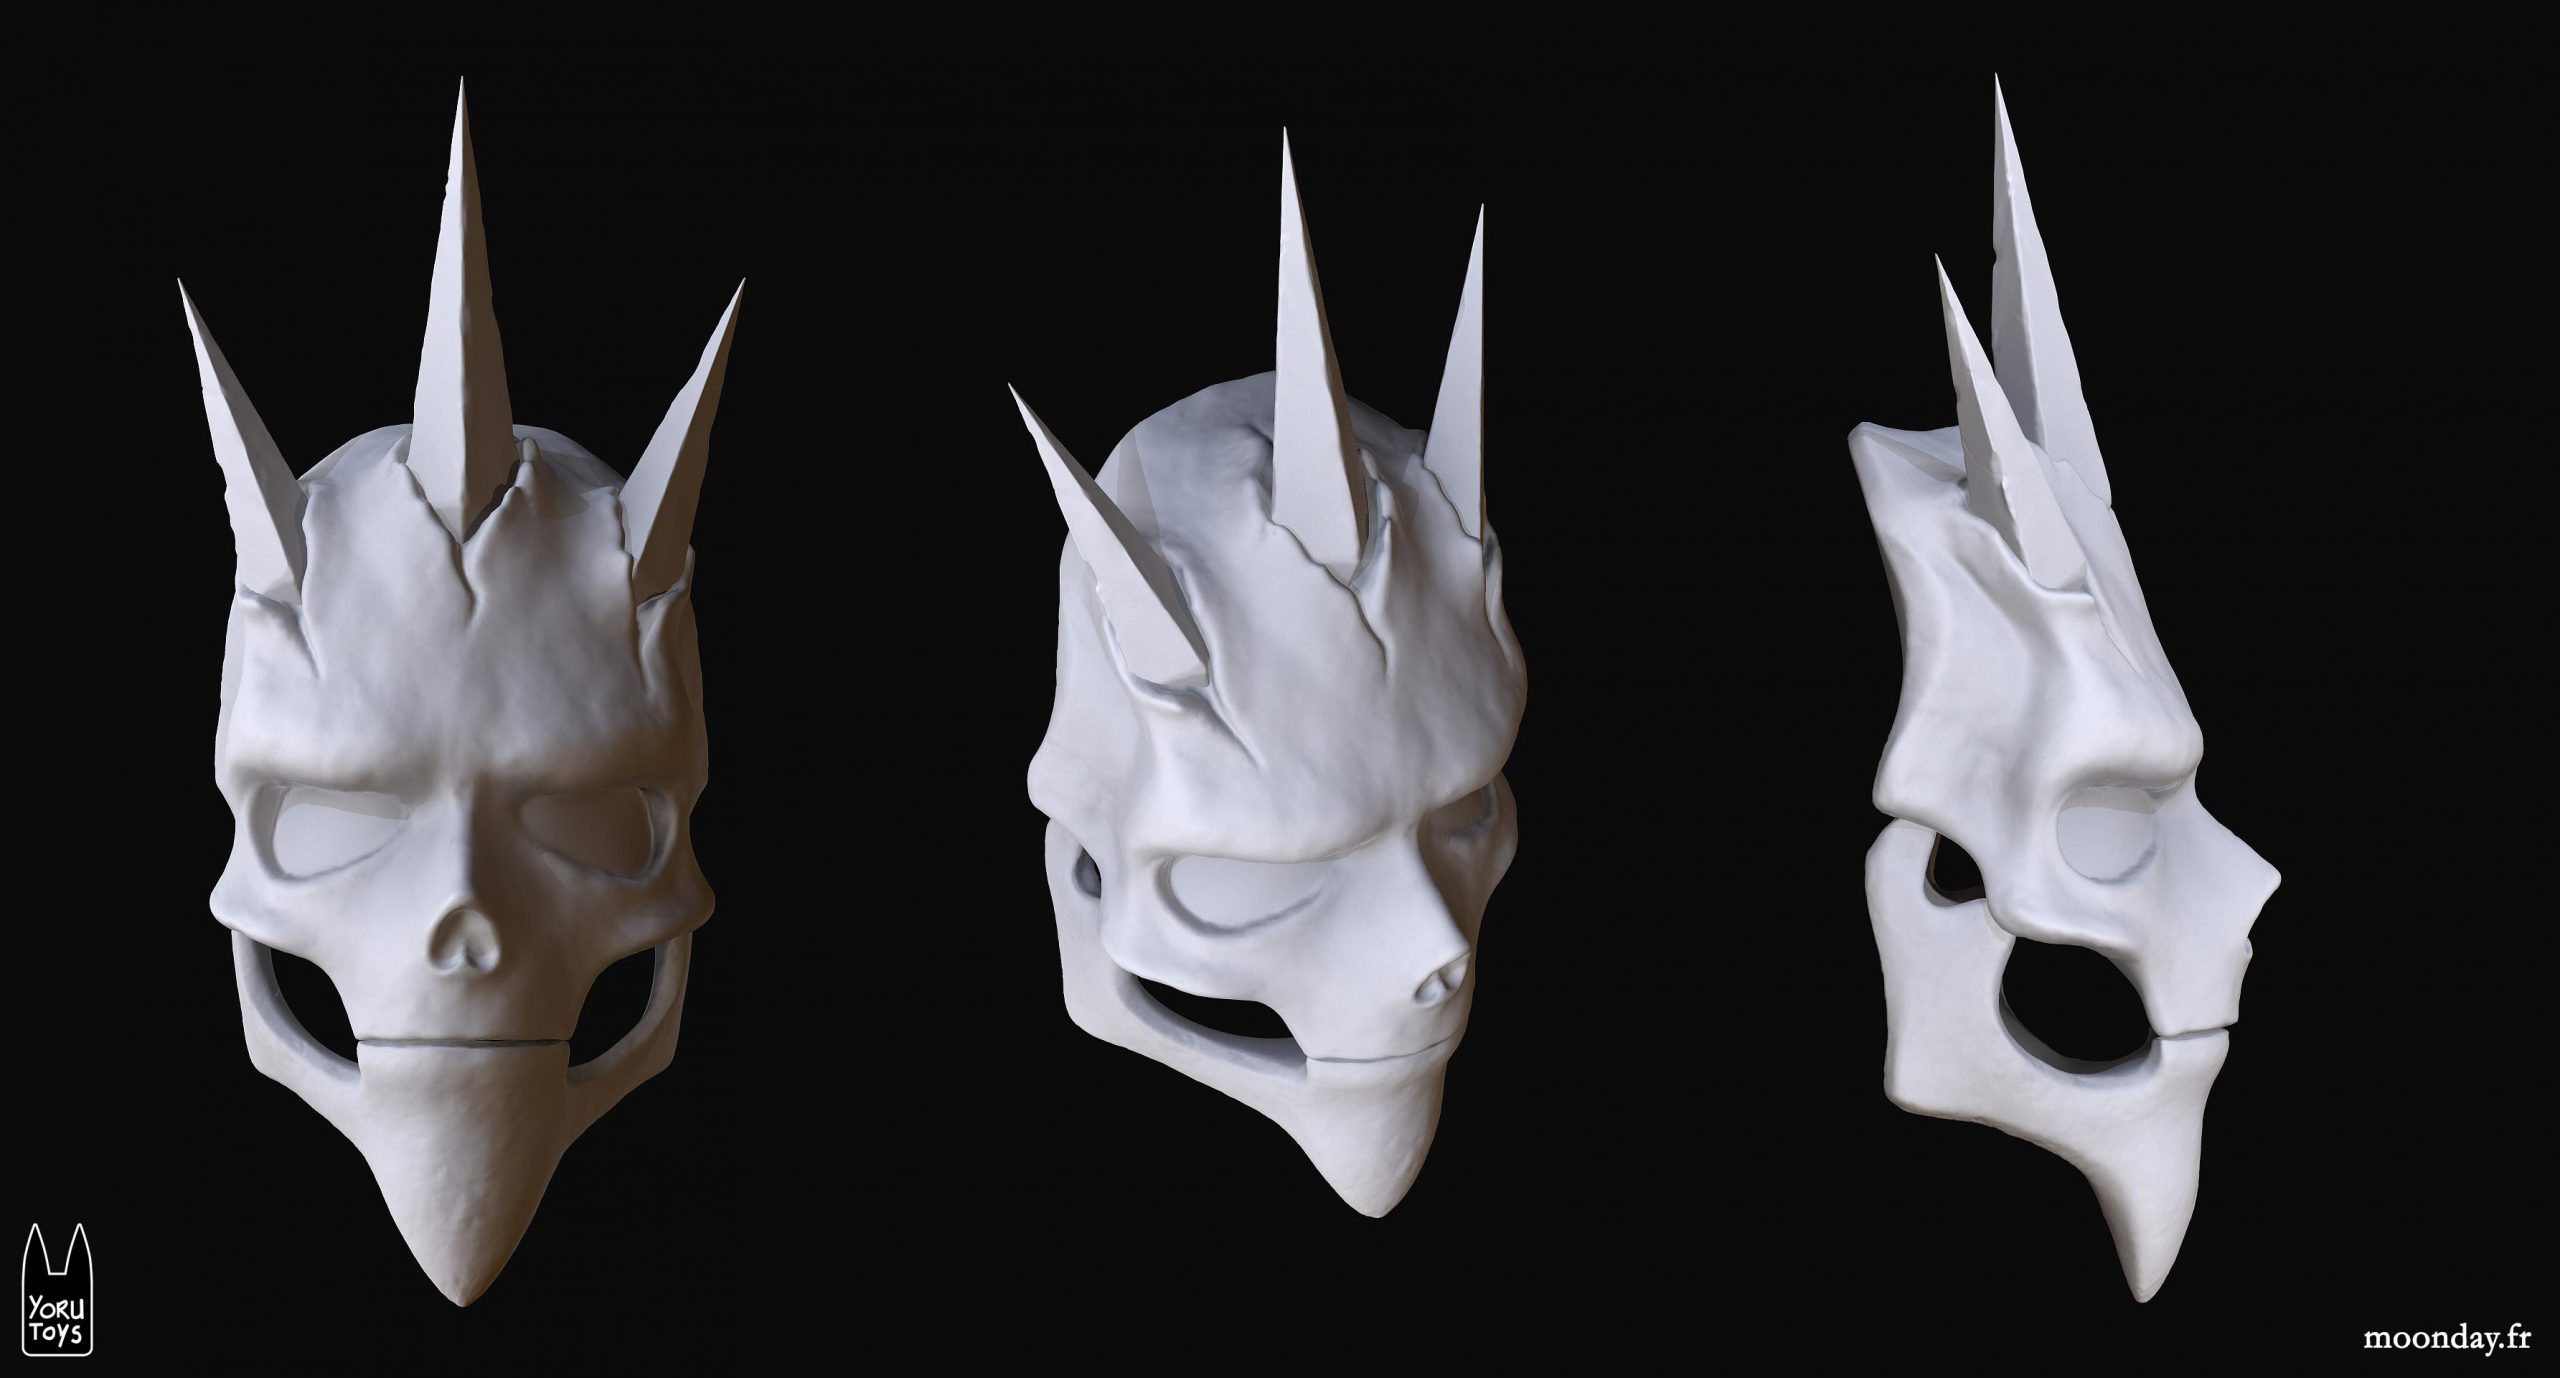
Low poly preview of the mask
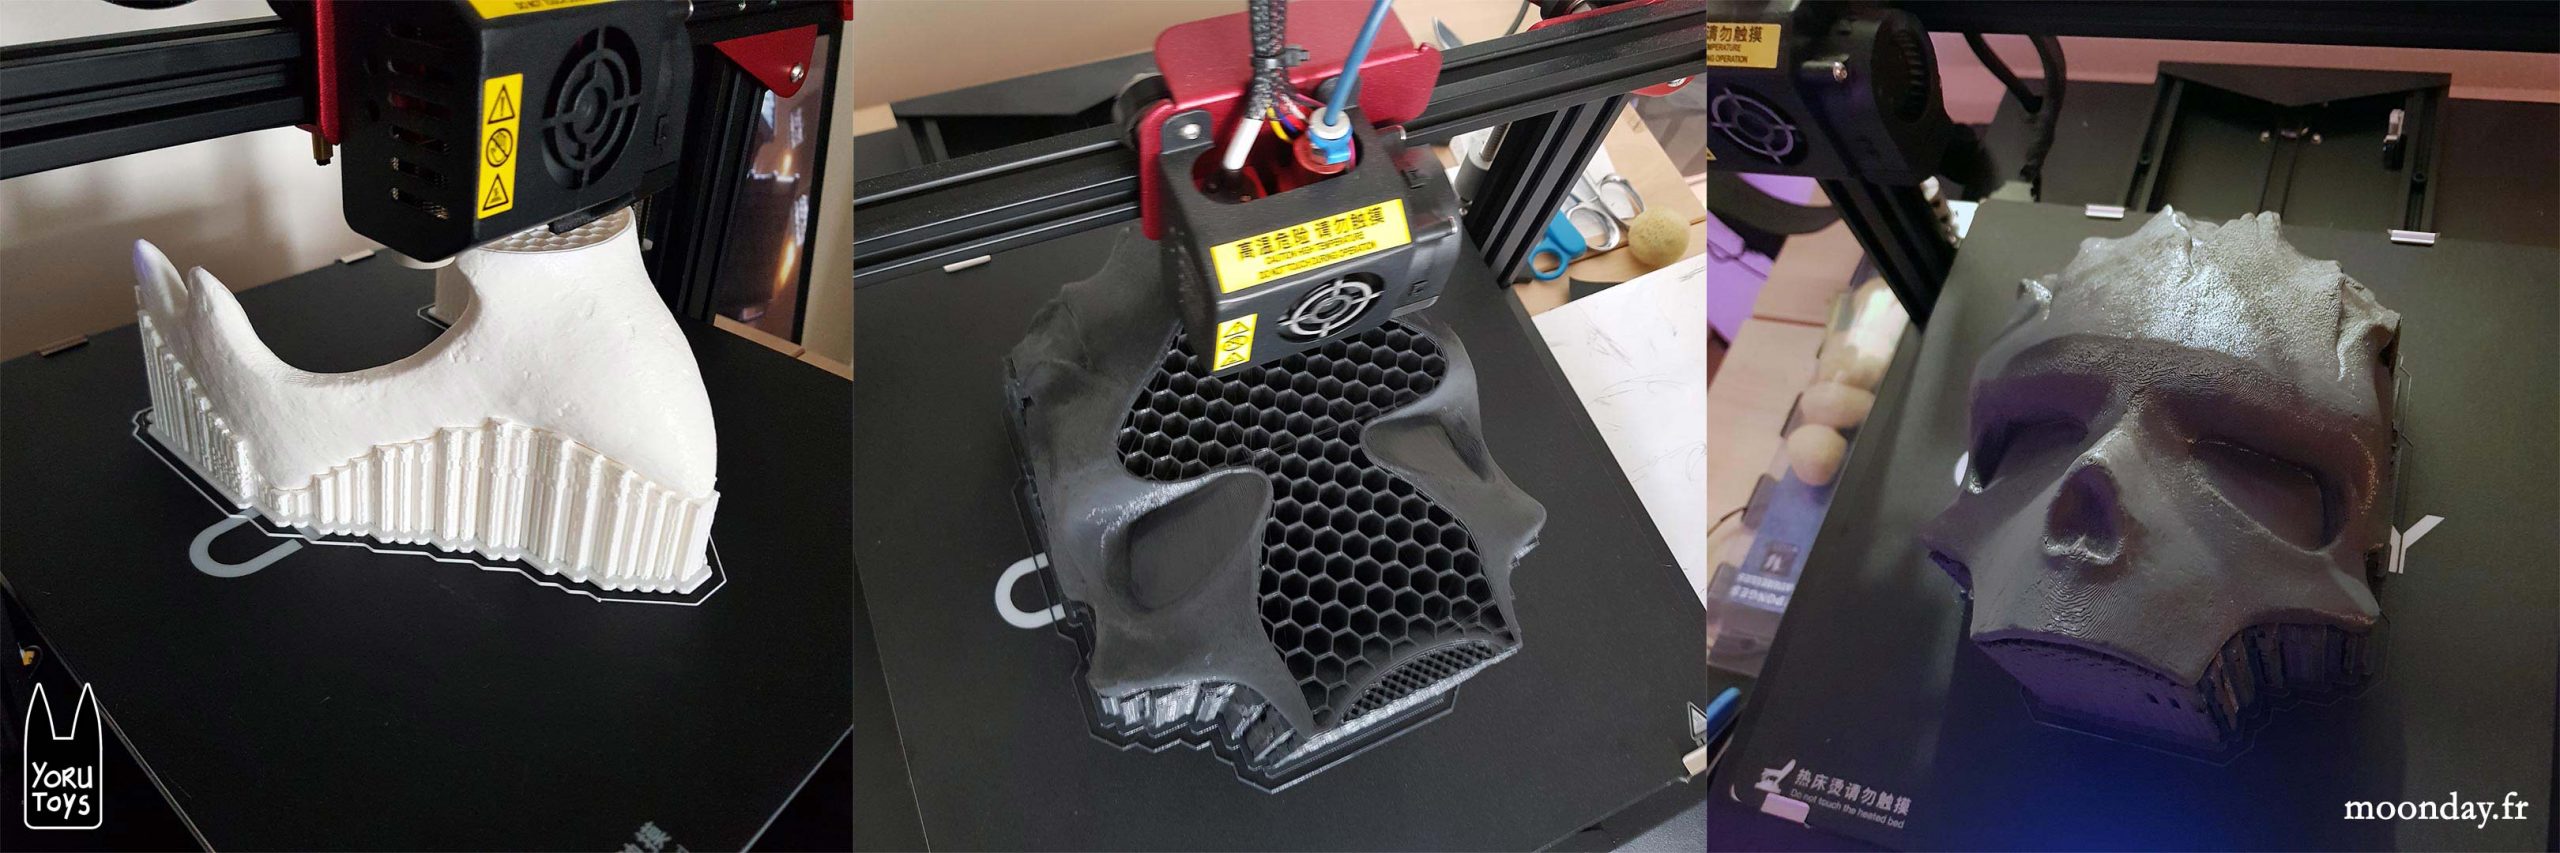
IV – 3D Print
Then came the time to print every parts, it took a few days for the main parts and only a couple of hours for the crown. This task was achieved on a CR10-s Pro from Creality. As I was running out of time I used rough settings: 240 microns for the skull and 120 microns for the crown parts but in the end the quality was here!
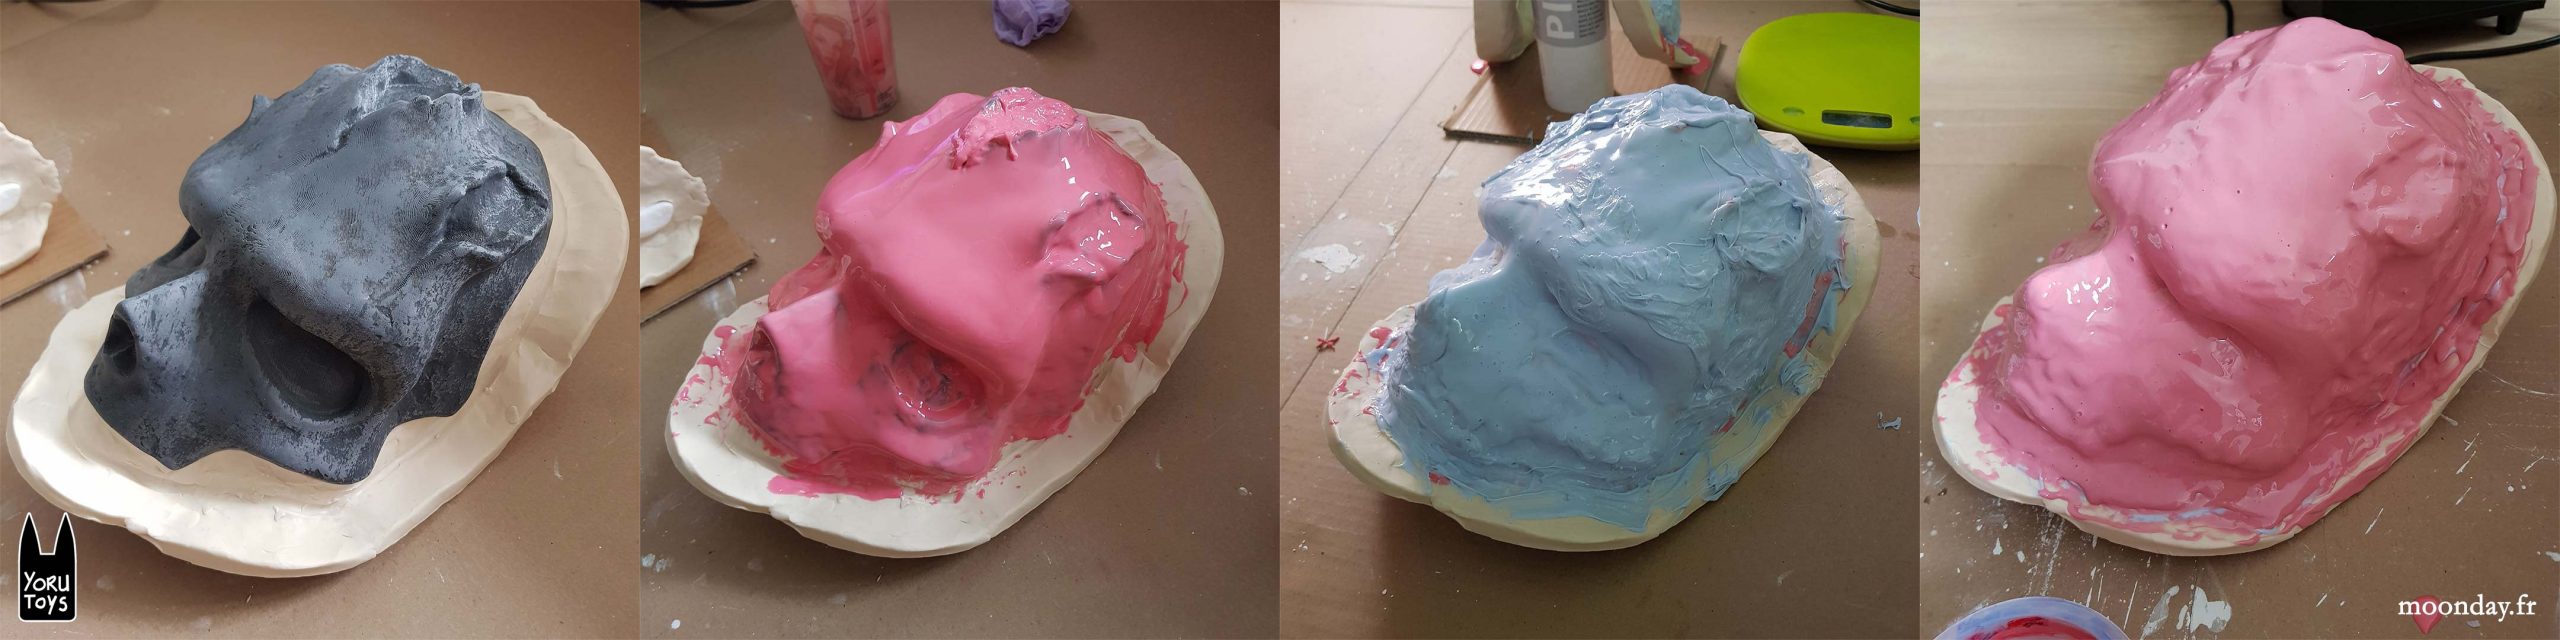
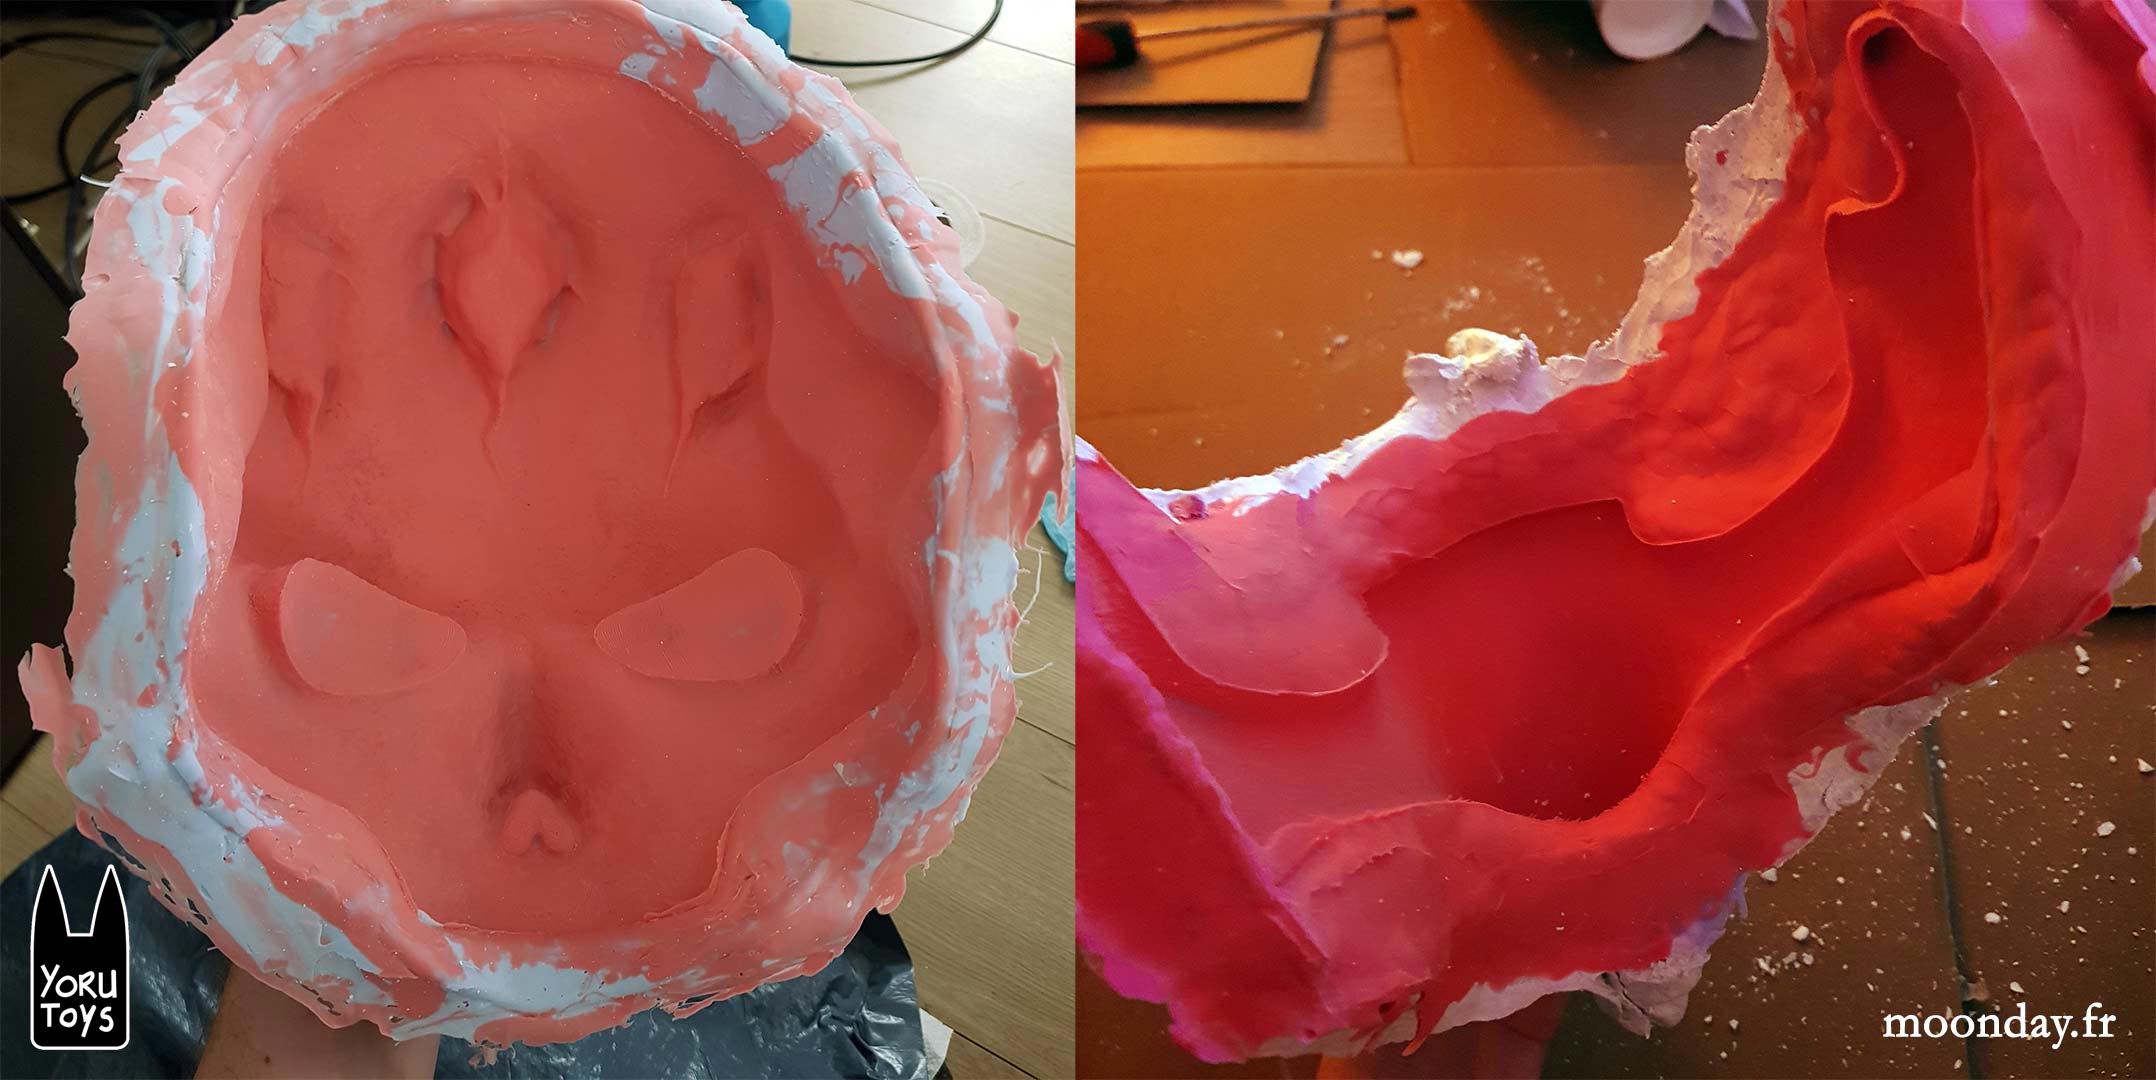
V – Moulding
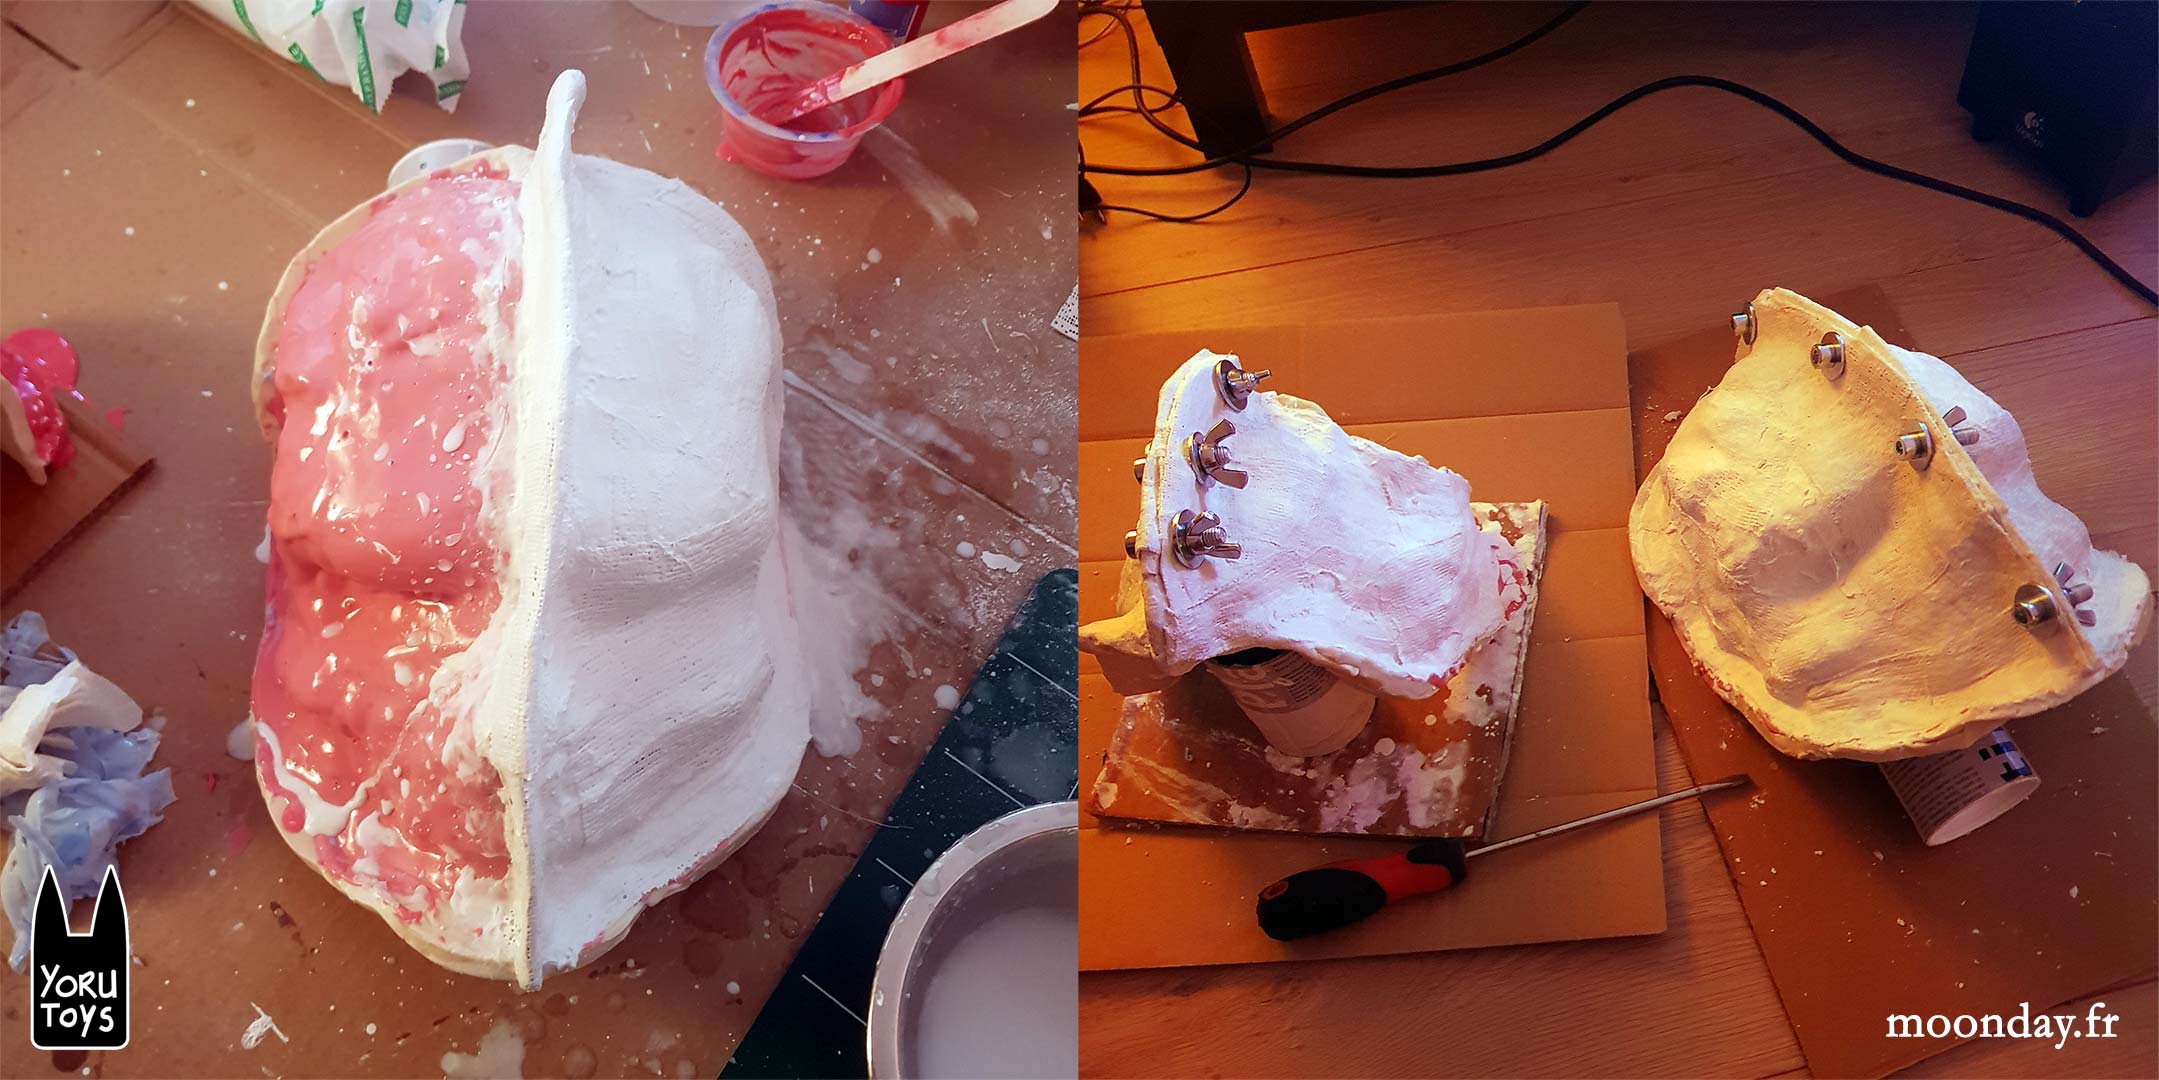
This next step was new for me, moulding something with silicone. I did 3 layers of silicone using Silicone RTV 181, the 2nd layer used a thickener. Then, simple plaster bands were used to reinforce the silicone moulds.
The art of icing funny non edible cupcakes
VI – Clothing
While waiting for the silicone and plaster to cure, it was time to start the sewing process, the hood was covered with 155 leaves, all cut by hand, next time I’ll look after a smarter solution like using the silhouette cameo paper cutting machine.
VII – Moulds check
Except a few leaks on the jaw part, the moulds ended up being awesome. However, as I didn’t have enough time to properly sand the 3D models, some silicone went deep in the surface, producing tiny hair of silicone that would create small holes in the final resin model but looking at the style of the mask it was OK.
Moulding the crown parts in 2 parts moulds was problematic as I thought baby powder would be enough to avoid the 2 parts sticking to each other. WRONG.
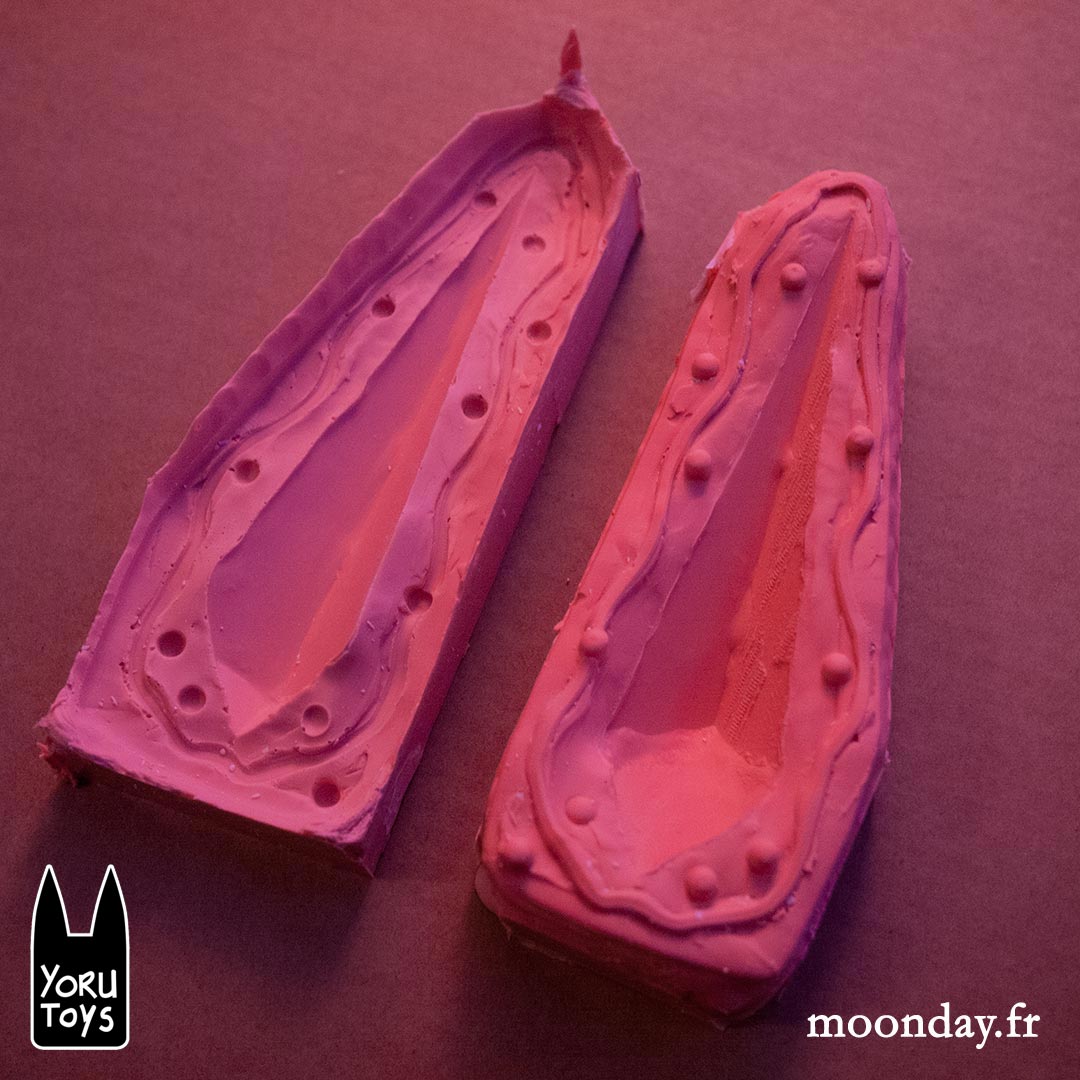
The only horn mould that perfectly survived my noobyness
VIII – Resin casting
The scary step. The shop I visited doesn’t have a lot of choice of fast curing resin therefore I chose the acrylic resin solution. Coming in a 2 parts products, one of the cans contains powder and after manually mixing it with the liquid part it produced a LOT of lumps. Maybe using an electric blender would have done a better job but also more bubbles.
However after a few layers applied (3 or 4 if I remember well) and a few hours of curing the result was incredible, it captured fine details, showing the rough 3D print settings and lack of strong sanding ^^
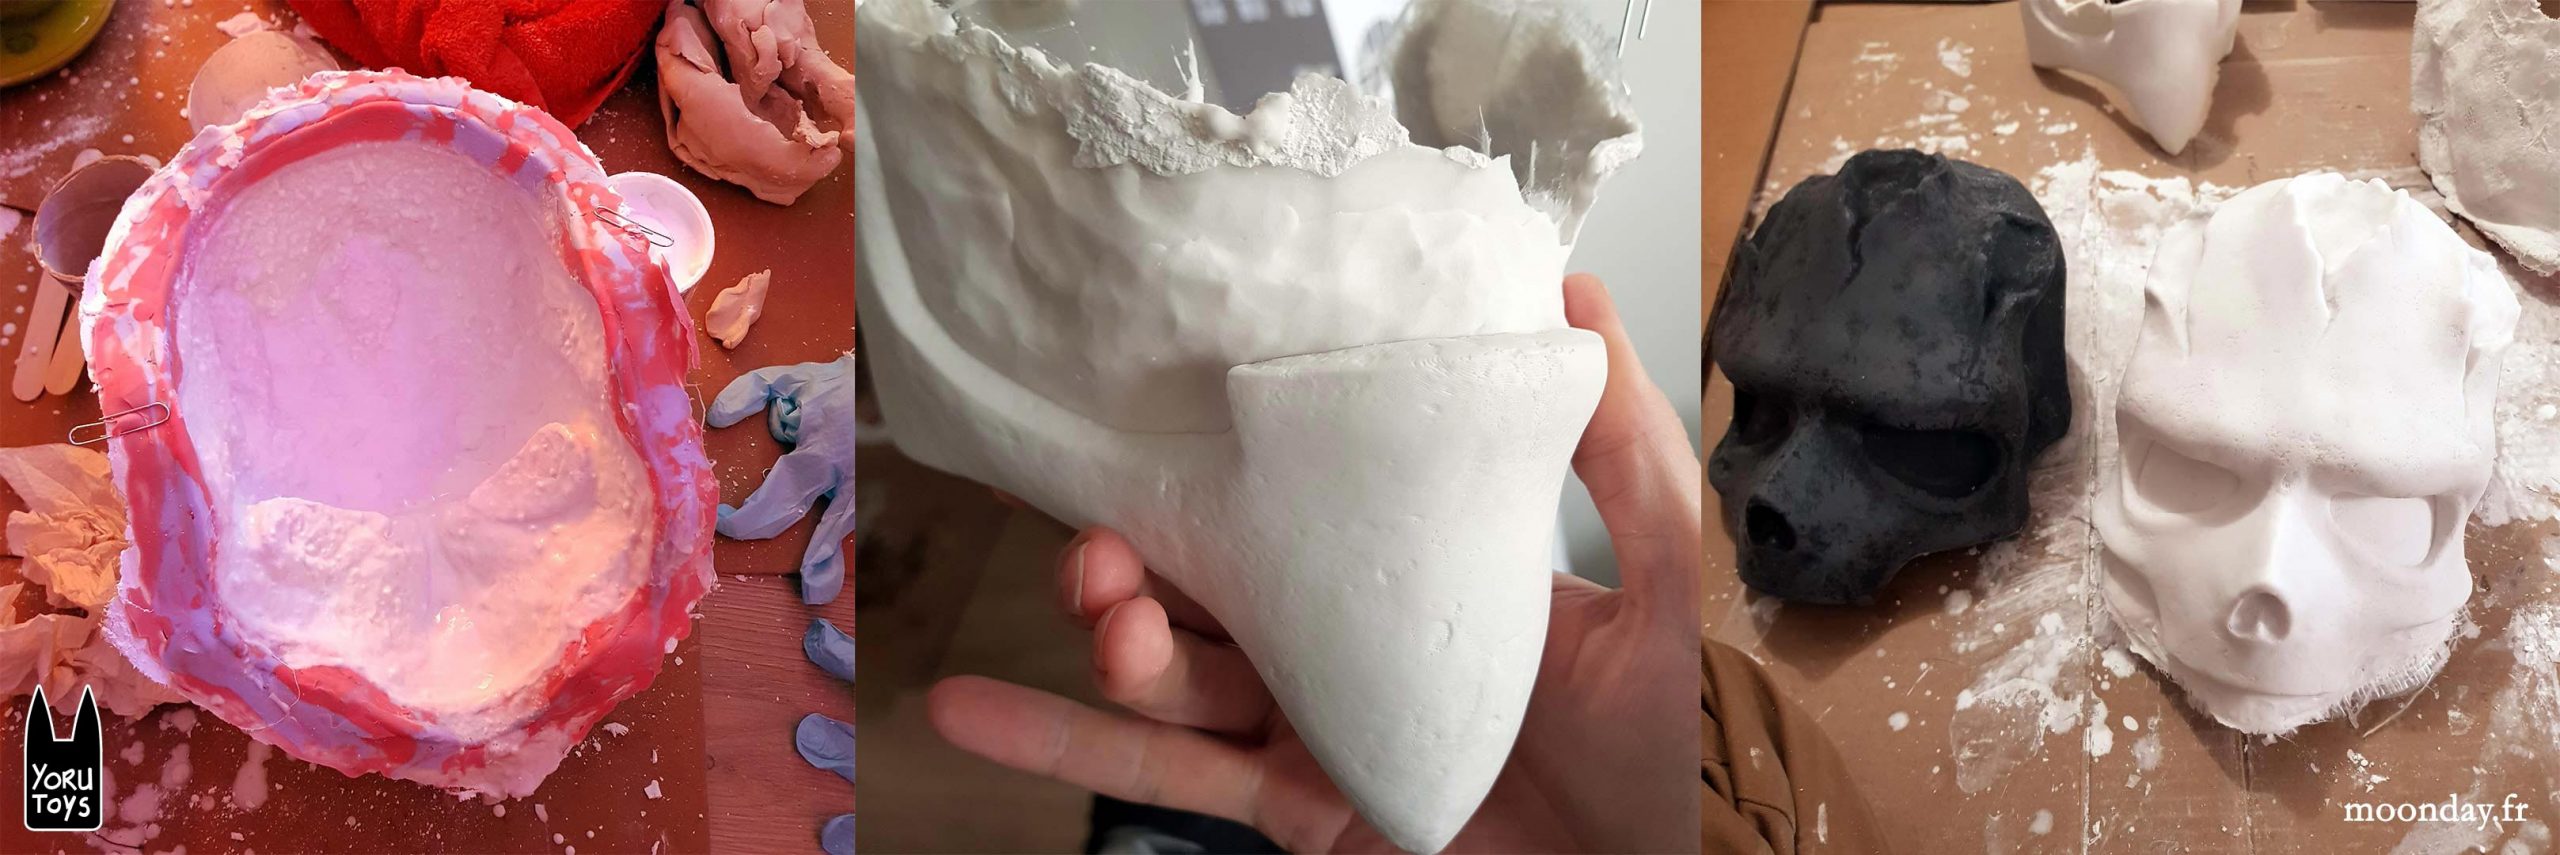
When I took the jaw part to try it on my huge face, due to the thin thickness, I unfortunately broke the part in 2 pieces.
Nothing dramatic, I did glue up the 2 parts together and applied a last layer or resin containing “verranne” cloth parts to solidify the mask.
Then I did cut the extra material with a rotary tool, teaching me I could have use less layers of resin. The final mask is pretty heavy to wear.
Finally, as I still couldn’t fit my own jaw in the resin jaw model, I had to cut off the back part and adjust the resin model. This explains the difference between the final mask and the original 3D model.
IX – Final touches
Originally the mask should have been white with translucency crown letting violet light from led lights to pass through BUT as I couldn’t cast the crown parts I had to use the 3D printed elements on the final mask. After a quick paint of black and gold acrylic the mask was ready to get Velcro strips glued on and fishnet attached on the eyes parts + some foam glued at strategic areas inside the mask.
Everything hold on the head with elastic bands hot glued on the mask itself.

X – Conclusion
This was a nice project, it was the first time I 3D printed a model so big and it turned out great. I can’t wait to work on my next costume project that will be more cosplay oriented as it will be an existing character.
Except the 3D printer and the clothes, all the products, materials used for this project were found in Rougier & plé and Tissus Myrtille (France)

